


Trithor
Chico (..... the clown)
I have started this thread in an attempt to answer questions about the basic steps of seed sterilization and rinsing as required for seed culture. I have tried a whole host of methods, but this is by far the easiest and most successful. It has an added benefit that due to the effective barrier, the process can be carried out in almost any situation, and does not require access to specialised equipment. If there is any interest I will make a more detailed step by step program, but to start, I think this should suffice?
The basic equipment needed is;
Packet of seed
Plastic disposable syringe
toothpick
face cotton swab
bottle of spray alcohol, (as distinct from that to be consumed during the process)
scissors
general purpose chlorine (unscented Jik or similar, basic household Sodium Hypochlorite)
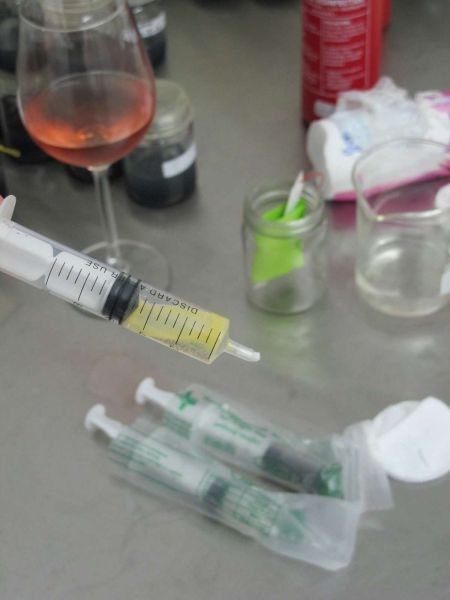
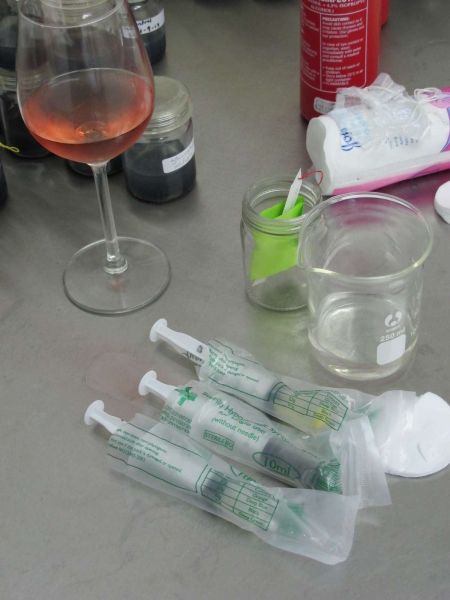
..... and of course a glass of wine. Rose is a good early afternoon option. I can highly recommend a good dry shiraz rose for the task ahead.
 Uploaded with ImageShack.com
The bleach is prepared using 5ml bleach and 40ml tap water. (a lower or higher concentration may be required depending on what you aim to achieve with the bleach) The bleach is used to both sterilize and to 'etch' the seed.
Cut a small square of 'face swab', about 7mm square. Using the tooth pick, press this square into the syringe nose. A bit of trial and error is needed at this point to get the correct fit. It must be secure, but not tight! A test draw on the plunger should leave the wad in the nose, but should not be too difficult to draw the plunger. (It will get much tighter when it gets wet)
 Uploaded with ImageShack.com
The cotton wad can be seen in the syringe nose. It is resting on a beaker of chlorine solution, and we are ready to start. Time to take an appreciative sip of wine!
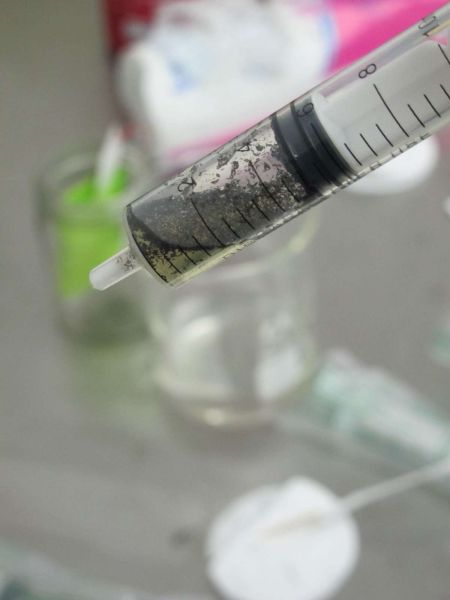
Now remove the plunger from the syringe and pour a measure of seed into the syringe body. Replace the plunger and depress the plunger till it is near the bottom, but do not compress the seed. The whole sterilization process takes place from here on out inside the syringe, so can be conducted anywhere that is vaguely clean. Sterility is not needed.
 Uploaded with ImageShack.com
Now draw up about 1ml of chlorine solution, and about 2ml of air. Shake the syringe and contents for about 1 min. Now spray the outside of the syringe with alcohol spray and insert it into the sleeve from the syringe while still wet.
The syringe needs periodic shaking for about 10 to 15 minutes. While it is in the plastic sleeve, wet with alcohol, it will remain sterile.
Uploaded with ImageShack.com
 Uploaded with ImageShack.com
 Uploaded with ImageShack.com
 Uploaded with ImageShack.com
 Uploaded with ImageShack.com
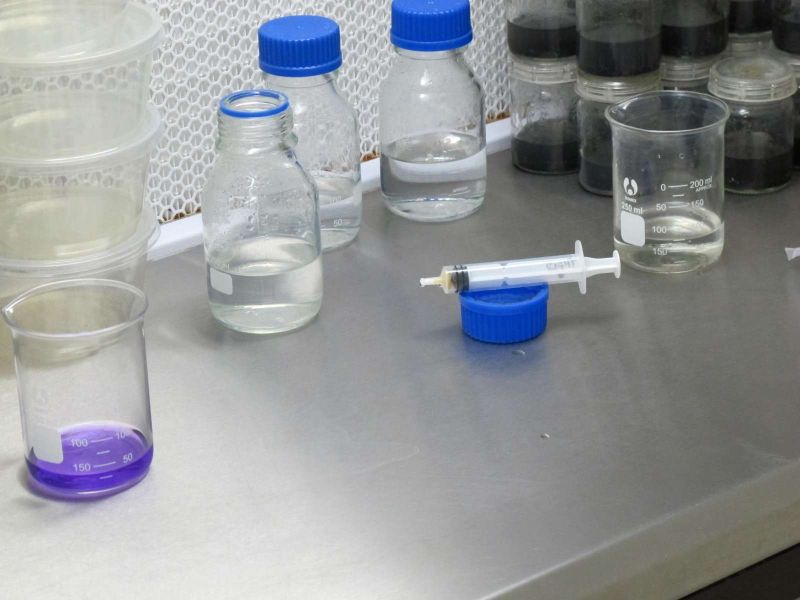
Now move your seed containing syringes into your flasking area (lam flow, glovebox, oven or other clean area)
 Uploaded with ImageShack.com
You will note that there is a scissors in the 'clean area' It is needed along with a forceps/tweezers to remove the cotton swab from the nose later in the process. At this point sterility is still not required as the seed is still isolated, but it makes a convenient time to move into the clean environment.
 Uploaded with ImageShack.com
Squirt out the chlorine solution into a suitable container. Now draw up a few ml of sterile water, shake the syringe, squeeze out the water, and draw up fresh sterile water. I find that three rinses is more than enough. When drawing up water, make sure that the tip of the syringe is in the mid column of water. Any spores and bacterial falling on the water will be held by the surface tension and will not be present in the short term in the mid water.
Draw up a final 1ml sterile water. Remove the cotton wad using forceps (at this point you may need to trim the plastic nose of the syringe to get to the cotton). Shake the syringe and squeeze a few drops of water with the suspended seed into the flasks. This is the only stage that requires a fairly sterile environment!
 Uploaded with ImageShack.com
Using this process I have been able to maintain 95% un-contaminated mother flasks.
I am sorry if my pictures are not illustrative enough, but it is difficult to perform the task and take pictures at the same time. (It did give me ample opportunity to take a few sips though)
The basic equipment needed is;
Packet of seed
Plastic disposable syringe
toothpick
face cotton swab
bottle of spray alcohol, (as distinct from that to be consumed during the process)
scissors
general purpose chlorine (unscented Jik or similar, basic household Sodium Hypochlorite)
..... and of course a glass of wine. Rose is a good early afternoon option. I can highly recommend a good dry shiraz rose for the task ahead.
Uploaded with ImageShack.comThe bleach is prepared using 5ml bleach and 40ml tap water. (a lower or higher concentration may be required depending on what you aim to achieve with the bleach) The bleach is used to both sterilize and to 'etch' the seed.
Cut a small square of 'face swab', about 7mm square. Using the tooth pick, press this square into the syringe nose. A bit of trial and error is needed at this point to get the correct fit. It must be secure, but not tight! A test draw on the plunger should leave the wad in the nose, but should not be too difficult to draw the plunger. (It will get much tighter when it gets wet)
Uploaded with ImageShack.comThe cotton wad can be seen in the syringe nose. It is resting on a beaker of chlorine solution, and we are ready to start. Time to take an appreciative sip of wine!
Now remove the plunger from the syringe and pour a measure of seed into the syringe body. Replace the plunger and depress the plunger till it is near the bottom, but do not compress the seed. The whole sterilization process takes place from here on out inside the syringe, so can be conducted anywhere that is vaguely clean. Sterility is not needed.
Uploaded with ImageShack.comNow draw up about 1ml of chlorine solution, and about 2ml of air. Shake the syringe and contents for about 1 min. Now spray the outside of the syringe with alcohol spray and insert it into the sleeve from the syringe while still wet.
The syringe needs periodic shaking for about 10 to 15 minutes. While it is in the plastic sleeve, wet with alcohol, it will remain sterile.
Uploaded with ImageShack.com
Uploaded with ImageShack.com
Uploaded with ImageShack.com
Uploaded with ImageShack.com
Uploaded with ImageShack.comNow move your seed containing syringes into your flasking area (lam flow, glovebox, oven or other clean area)
Uploaded with ImageShack.comYou will note that there is a scissors in the 'clean area' It is needed along with a forceps/tweezers to remove the cotton swab from the nose later in the process. At this point sterility is still not required as the seed is still isolated, but it makes a convenient time to move into the clean environment.
Uploaded with ImageShack.comSquirt out the chlorine solution into a suitable container. Now draw up a few ml of sterile water, shake the syringe, squeeze out the water, and draw up fresh sterile water. I find that three rinses is more than enough. When drawing up water, make sure that the tip of the syringe is in the mid column of water. Any spores and bacterial falling on the water will be held by the surface tension and will not be present in the short term in the mid water.
Draw up a final 1ml sterile water. Remove the cotton wad using forceps (at this point you may need to trim the plastic nose of the syringe to get to the cotton). Shake the syringe and squeeze a few drops of water with the suspended seed into the flasks. This is the only stage that requires a fairly sterile environment!
Uploaded with ImageShack.comUsing this process I have been able to maintain 95% un-contaminated mother flasks.
I am sorry if my pictures are not illustrative enough, but it is difficult to perform the task and take pictures at the same time. (It did give me ample opportunity to take a few sips though)
") !!!! Jean
!!!! Jean