Potting deflasked seedlings - leave some agar or rinse it all away?

Slippertalk Orchid Forum

Help Support Slippertalk Orchid Forum:

This site may earn a commission from merchant affiliate links, including eBay, Amazon, and others.
A

ALToronto

Guest
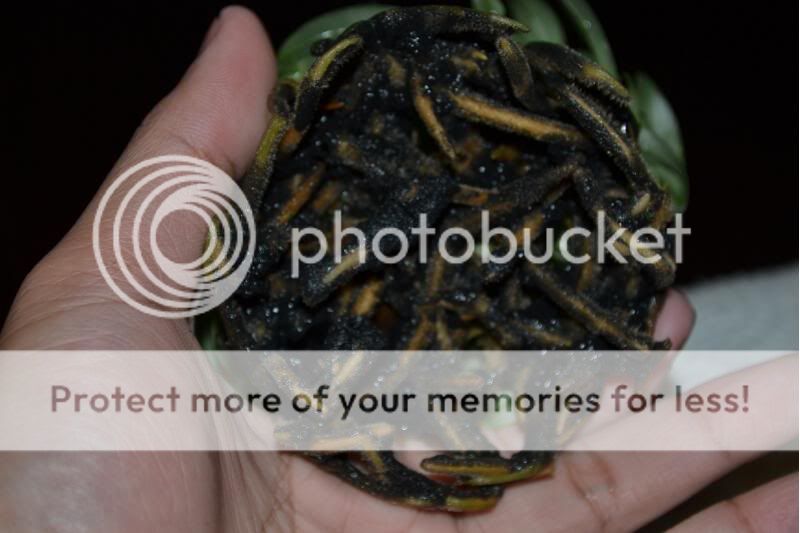
I've heard both opinions, and I've tried it both ways. When I left some agar on the roots, it quickly grew grey fuzzy mold. Then it hardened into fairly rigid chunks that were stuck to the roots.

So my question really is: if you do leave some agar, how do you prevent these problems?
 
This is fine. You don't have to remove it all.

clean-root-ball.jpg
 
it might be different for different agar formulations so you may have to adjust based on context, but for flasks from Orchid Inn, i have gone lately to not removing any agar whatsoever. I just pot it up and the agar is all gone within a few weeks. Much less bruising/trauma to roots and leaves this way.
 
Do not think it makes a lot of difference. I have deflasked a lot without agar and have had very good results. Of course, leaving the agar is easier.:evil:
 
I started potting up newly deflasked seedlings completely undisturbed, a number of years ago and it works really well. Plus, deflasking and potting up a flask using this method takes only about a minute, rather than hours (if you have OCD about removing all the agar and separating all the seedlings. What a lot of work!).

First of all, open the flask a day or two before you deflask. Leave the top off to allow the fresh air inside and start the hardening off process before they are disturbed at all. After a maximum of about 48 hours, there will still not be any mould or other "fuzzy" stuff growing; but, the seedlings will be much happier because of having the gentle introduction to the outside world.

Then, half fill a 5" pot with drainage material (whole styrofoam peanuts) and then put about an inch of moistened seedling grade potting mix on top of the peanuts. Place the flask on top of the layer of mix, centred in the pot. Then, fill in around the flask with more mix, raising the mix up just a bit more than the thickness of the agar in the flask. Carefully remove the flask, leaving a perfectly flask-shaped "pot-hole" in the mix. Next, remove the seedlings, along with their agar, left completely intact and carefully settle the agar "disk" into the "pot-hole" in the 5" pot. Gently adjust the medium around the agar disk; but, do not press down. If the agar disk is a bit high, carefully add a little more mix all around it until the mix is just barely above the level of the agar. Then, sprinkle a bit more mix in amongst the seedlings and use an artist's paintbrush to gently "flick" it and make it settle through the leaves and sit on the agar surface. It's not important to cover every bit of agar so that you cannot see it. Just get most of the agar surface that is exposed to the air, under some potting mix. Gently; but, thoroughly water the seedlings with a fine mist and place in your seedling growing area.

This way, the seedlings have been deflasked and potted; but, with zero stress and damage being done to them. The agar may grow some grey fuzzy mould; but, so what. Just care for the seedlings as you would seedlings that were potted without their agar. The agar will disolve away if it's very soft, or it may dry a bit and stiffen. Again, so what. The seedlings will begin growing new roots, as they continue to be supported by their undamaged, agar roots. As time passes (3 to 6 months), the seedlings will increase in size and grow roots out of the agar disk and into the potting mix. Once the seedlings have added some size, you can unpot them all, separate them, grade them and pot them up......the largest ones into their own pots and put the rest in 3" community pots of 3 or 4 seedlings each. Seedling roots can be impossible to separate when they are freshly deflasked and more often than not, lots of unnecessary damage is done by people who insist on removing all the agar and separating all the seedlings. It's NOT necessary. After the seedlings have grown this way for a few months, as described above, they come apart from each other much more easily at repotting time. Much less damage is done and you end up WAY ahead because you didn't cause them severe trauma on deflasking day. I can deflask and pot up 20 flasks an hour using this method. Here are a couple photos of a bunch of Cattleya seedlings that I deflasked using this easy and much better method.
Cattleya%20compots%20March%202012.JPG


2012-03-20%20014-2.JPG
 
Last edited:
i agree with everything john mentioned above. also great tip about opening the flask a couple days before taking the plants out. agree on that too.
 
Thank you John! I wish I had known this two years ago.

Now, next question: do you sterilize the potting mix? When I use clay or lava rock, I pressure cook it. Do you do something similar with the bark and perlite?
 
Thank you John! I wish I had known this two years ago.

Now, next question: do you sterilize the potting mix? When I use clay or lava rock, I pressure cook it. Do you do something similar with the bark and perlite?

You're welcome! I tried deflasking this way after hearing that's how the Wellensteins at Antec Labs did it. 'Works great!

No, I don't sterilize the potting mix. I just use it right out of the bags; mix the ingredients on my potting bench and begin potting. I sterilize my cutting tools, used name tags and used pots; but, I never reuse old potting mix; so, I see no reason why that would be beneficial.
 
I started potting up newly deflasked seedlings completely undisturbed, a number of years ago and it works really well. Plus, deflasking and potting up a flask using this method takes only about a minute, rather than hours (if you have OCD about removing all the agar and separating all the seedlings. What a lot of work!).

First of all, open the flask a day or two before you deflask. Leave the top off to allow the fresh air inside and start the hardening off process before they are disturbed at all. After a maximum of about 48 hours, there will still not be any mould or other "fuzzy" stuff growing; but, the seedlings will be much happier because of having the gentle introduction to the outside world.

Then, half fill a 5" pot with drainage material (whole styrofoam peanuts) and then put about an inch of moistened seedling grade potting mix on top of the peanuts. Place the flask on top of the layer of mix, centred in the pot. Then, fill in around the flask with more mix, raising the mix up just a bit more than the thickness of the agar in the flask. Carefully remove the flask, leaving a perfectly flask-shaped "pot-hole" in the mix. Next, remove the seedlings, along with their agar, left completely intact and carefully settle the agar "disk" into the "pot-hole" in the 5" pot. Gently adjust the medium around the agar disk; but, do not press down. If the agar disk is a bit high, carefully add a little more mix all around it until the mix is just barely above the level of the agar. Then, sprinkle a bit more mix in amongst the seedlings and use an artist's paintbrush to gently "flick" it and make it settle through the leaves and sit on the agar surface. It's not important to cover every bit of agar so that you cannot see it. Just get most of the agar surface that is exposed to the air, under some potting mix. Gently; but, thoroughly water the seedlings with a fine mist and place in your seedling growing area.

This way, the seedlings have been deflasked and potted; but, with zero stress and damage being done to them. The agar may grow some grey fuzzy mould; but, so what. Just care for the seedlings as you would seedlings that were potted without their agar. The agar will disolve away if it's very soft, or it may dry a bit and stiffen. Again, so what. The seedlings will begin growing new roots, as they continue to be supported by their undamaged, agar roots. As time passes (3 to 6 months), the seedlings will increase in size and grow roots out of the agar disk and into the potting mix. Once the seedlings have added some size, you can unpot them all, separate them, grade them and pot them up......the largest ones into their own pots and put the rest in 3" community pots of 3 or 4 seedlings each. Seedling roots can be impossible to separate when they are freshly deflasked and more often than not, lots of unnecessary damage is done by people who insist on removing all the agar and separating all the seedlings. It's NOT necessary. After the seedlings have grown this way for a few months, as described above, they come apart from each other much more easily at repotting time. Much less damage is done and you end up WAY ahead because you didn't cause them severe trauma on deflasking day. I can deflask and pot up 20 flasks an hour using this method. Here are a couple photos of a bunch of Cattleya seedlings that I deflasked using this easy and much better method.
Cattleya%20compots%20March%202012.JPG


2012-03-20%20014-2.JPG

I was just surfing for some info on this subject and ended up on ST...again.
Thanks John for this informative post. I will do it like this from now on. I'm quite sick of separating the little suckers. I don't have too many losses by separating them but I still feel the disturbance sets them back. Plus it's a lot of work if you have a bunch of them to do!!
 
I also pot them as the whole thing without separating them, and it works the best!
I tried separating them before and I lost some by accidentally stripping roots apart and/or off. Plus, the smalles few seedlings always died when separated.

They grow happily together.
Now I need to untangle some one year old ( I know I'm too lazy to seperate them) babies but probably too late and better off doing it in the end of winter.
 
Back
Top