naoki
Well-Known Member
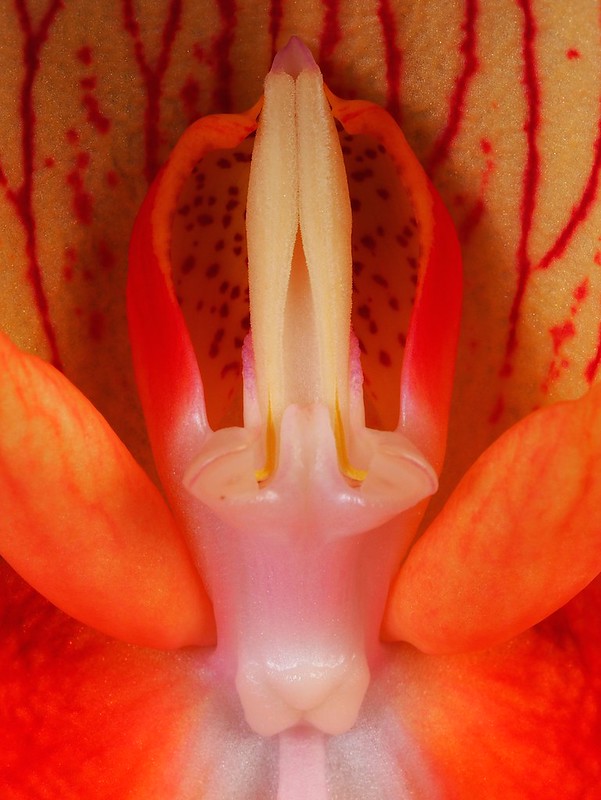
I just made a small ebb-flow hydroponic system for my Disa uniflora. I thought that some people may be interested in. Most parts are from Lowes/Home Depot.
Parts:
Total: about $67
I got two plastic containers: one is for the growing space and the other is for the water reservoir.
First, I made the drain hole to the growing case. Since the plastic is a bit flimsy, I decided to use a bulk head union. Without thinking too much I started to drill with a hole saw.
Oops, it is not a good idea, and this is what happens. I should have used a supporting block and/or duct tape.
Well, I had to go back to Walmart to get a new box. This time, I used a soldering iron (toxic but less likely to screw up). I put a nail to the soldering iron because I didn't want to ruin the soldering iron tip.
The bulkhead is attached:

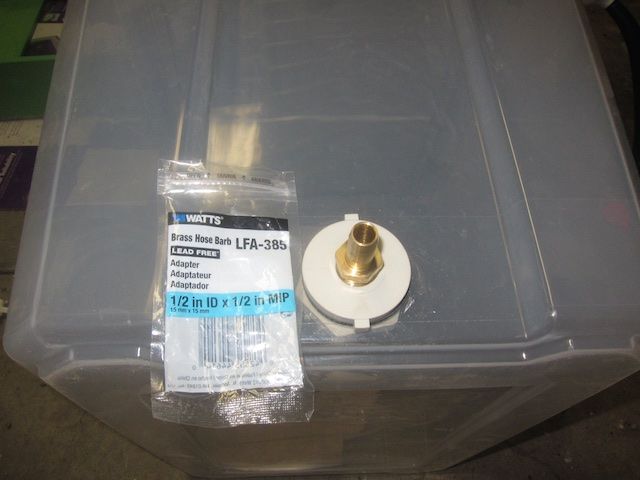
Here are the other parts needed.
From left:
Brass Hose barb (1/2" ID x 1/2" MIP), which is screwed into the bulkhead from outside, and it is connected to the return tube to the reservoir.
1/2" MIP to 1/2" CPVC adapter
1/2" CPVC street elbow
1/2" tubing

Attached the hose barb adapter to the outside. I had to use the Teflon tape for plumbing for this connection (otherwise, it was leaking).
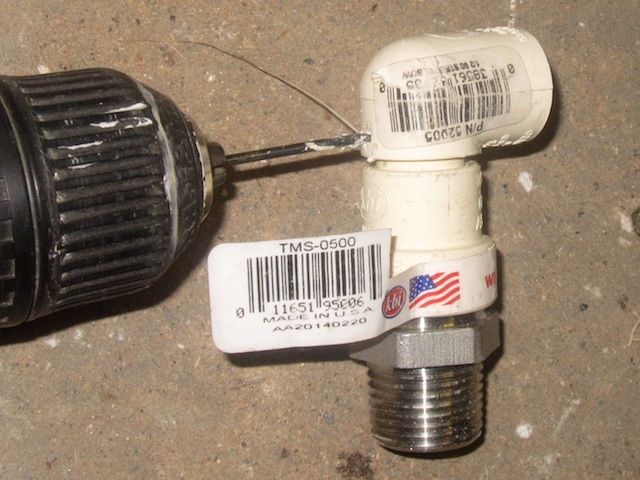
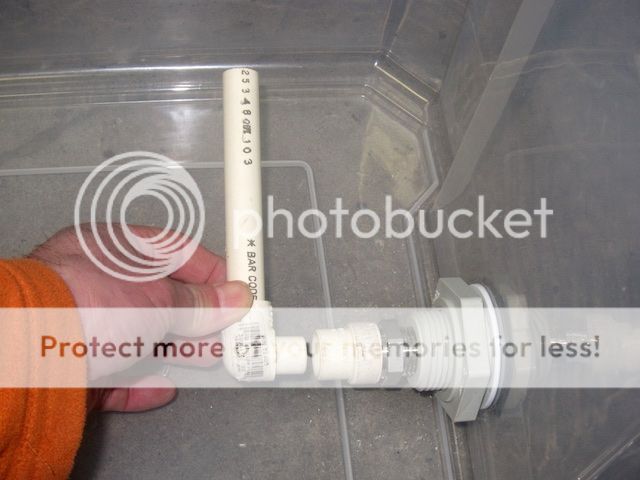
Here I'm showing a street elbow (one side is male, and the other side is female) attached to the MIP to CPVC adapter. I'm drilling two small holes (5/64"). These small holes make the water to drain out slowly.

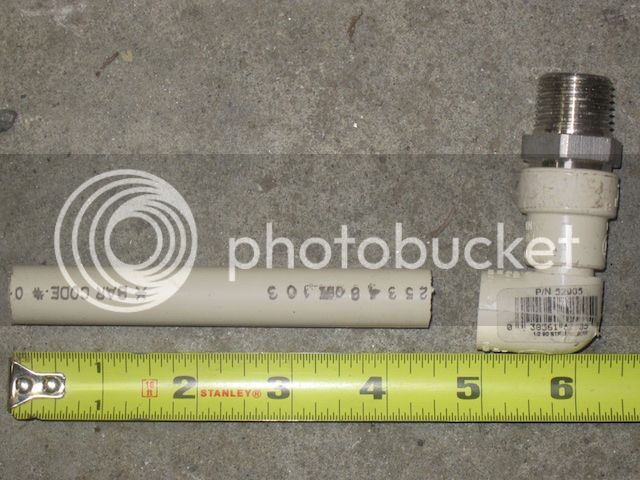
Now, I cut a small section of 1/2" CPVC. The length of this pipe determines the water level when the water is pumped in to the growth case.
Now I attach the assembled elbow to inside of the bulkhead. Here is the inside view of the bulkhead.
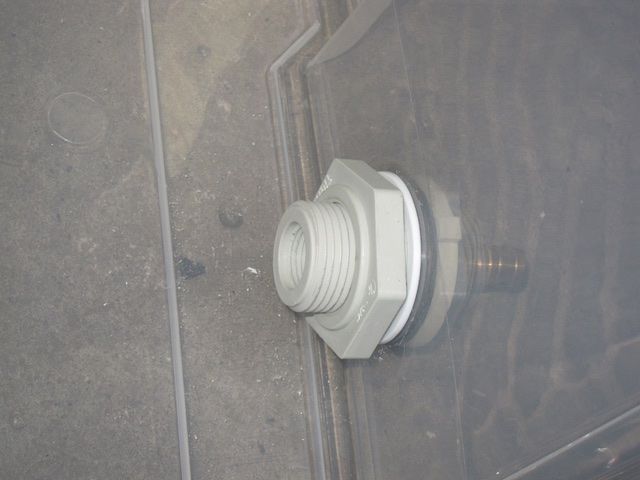
Screw in the MIP to CPVC adapter. Then attach the elbow and the drain pipe. The CPVC parts are not glued, just friction fitted.
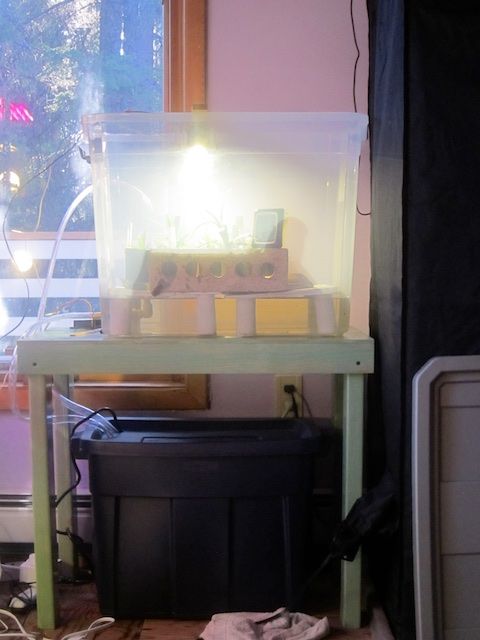
I made two tables from a cedar siding plunk that I happen to find in the backyard and legs are from some branches that I found in the firewood pile. Later, I painted these with water-proofing Elastomeric paint (frequently used for roofing). Also I made a hole to the top right for the water supply tube. The water pump supplies water through the tubing through this hole.

Assembly done:
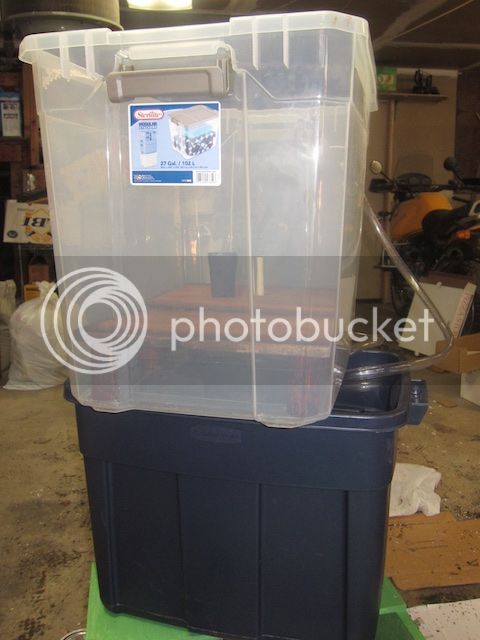

I made a green table from left-over lumbers and set up the system inside. I made two holes to the cover of the reservoir: one for the tube going to the growing box and one for the returning tube.
Parts:
- Sterilite 27 gallon plastic container (for the grow box), $15.55 from Walmart.
- Rubbermaid Roughneck 18 gallon plastic container (for the reservoir), around $12.
- PonicPump 12005 (submersible pump used for fountains, 120GPH @ 0' lift, 6W), about $14
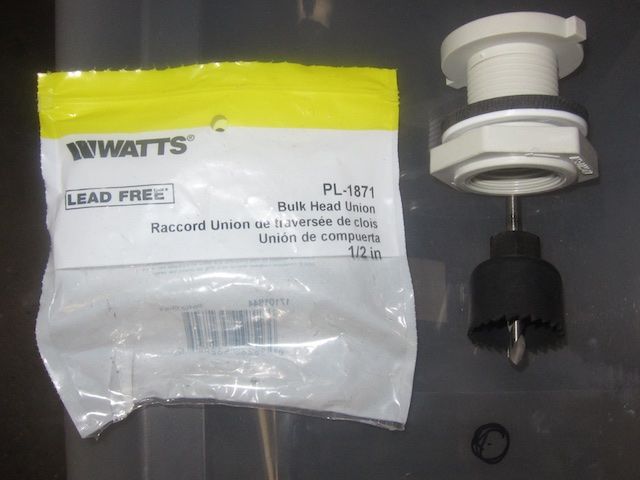
- Watts PL-1871 1/2" Bulk Head Union, $10.98 from Lowe's
- Watts LFS-385 Brass Hose barb (1/2" ID x 1/2" MIP), $4.58 from Lowe's
- kbi TMS-0500 1/2" MIP to 1/2" CPVC adapter, $5.10 from Lowe's
- 1/2" CPVC street elbow, $0.98 from Lowe's
- 1/2" CPVC (short section)
- 1/2" vinyl tubing (5/8" OD x 1/2" ID), 7' for $3.15 from Lowe's
Total: about $67
I got two plastic containers: one is for the growing space and the other is for the water reservoir.
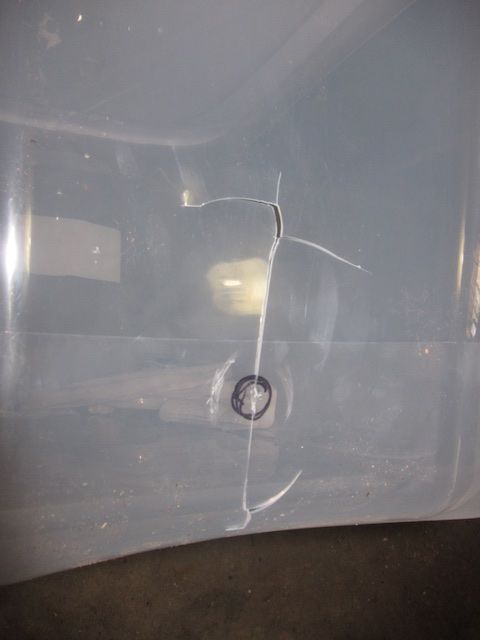
First, I made the drain hole to the growing case. Since the plastic is a bit flimsy, I decided to use a bulk head union. Without thinking too much I started to drill with a hole saw.

Oops, it is not a good idea, and this is what happens. I should have used a supporting block and/or duct tape.

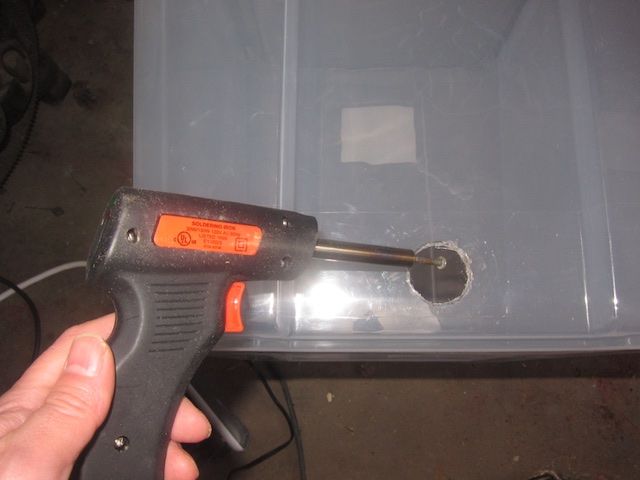
Well, I had to go back to Walmart to get a new box. This time, I used a soldering iron (toxic but less likely to screw up). I put a nail to the soldering iron because I didn't want to ruin the soldering iron tip.

The bulkhead is attached:

Here are the other parts needed.
From left:
Brass Hose barb (1/2" ID x 1/2" MIP), which is screwed into the bulkhead from outside, and it is connected to the return tube to the reservoir.
1/2" MIP to 1/2" CPVC adapter
1/2" CPVC street elbow
1/2" tubing

Attached the hose barb adapter to the outside. I had to use the Teflon tape for plumbing for this connection (otherwise, it was leaking).

Here I'm showing a street elbow (one side is male, and the other side is female) attached to the MIP to CPVC adapter. I'm drilling two small holes (5/64"). These small holes make the water to drain out slowly.


Now, I cut a small section of 1/2" CPVC. The length of this pipe determines the water level when the water is pumped in to the growth case.

Now I attach the assembled elbow to inside of the bulkhead. Here is the inside view of the bulkhead.

Screw in the MIP to CPVC adapter. Then attach the elbow and the drain pipe. The CPVC parts are not glued, just friction fitted.

I made two tables from a cedar siding plunk that I happen to find in the backyard and legs are from some branches that I found in the firewood pile. Later, I painted these with water-proofing Elastomeric paint (frequently used for roofing). Also I made a hole to the top right for the water supply tube. The water pump supplies water through the tubing through this hole.

Assembly done:


I made a green table from left-over lumbers and set up the system inside. I made two holes to the cover of the reservoir: one for the tube going to the growing box and one for the returning tube.

Last edited:


 I know what I'm ordering on payday!! OMG! This is the most dangerous website on the web!!