Stem cutting for propagating maudiae-type paph

Slippertalk Orchid Forum

Help Support Slippertalk Orchid Forum:

This site may earn a commission from merchant affiliate links, including eBay, Amazon, and others.

hardy

Well-Known Member
Joined
Jan 4, 2009
Messages
443
Reaction score
8
Location
Malang, Indonesia
Some terrestrial orchids like vanilla and the jewel orchids are so easy to
propagate by stem cutting. When conditions are favorable, even single node
cuttings of these orchids will survive. I think paphs are closely related to
these terrestrials, since these orchids have crumbly pollen and actually give
off the same odor through their sap when their tissues are bruised. I had on
hand some etiolated Paph. Hilo Citron seedlings (green maudiae) and tried
the stem cutting method on them. I'm glad to say it's been a success.
Here are some photos to share ^_^

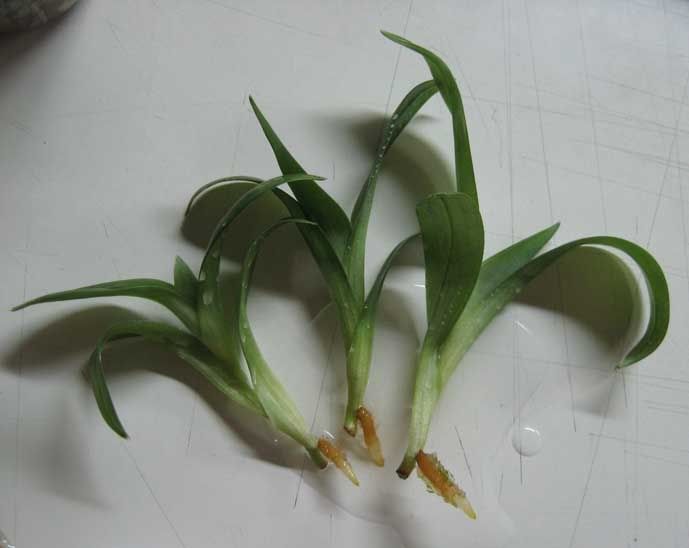
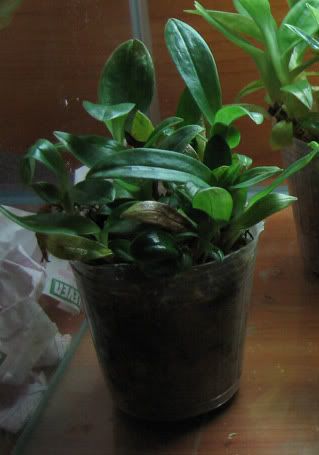
Starting point: seedlings 14 months from flask:
c1.jpg


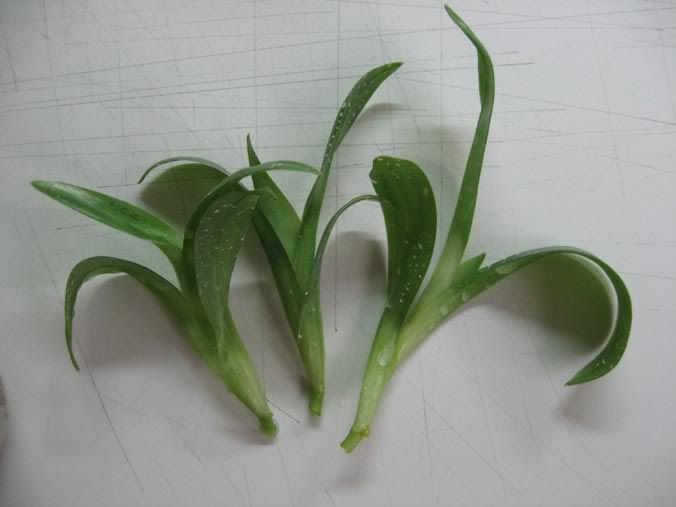
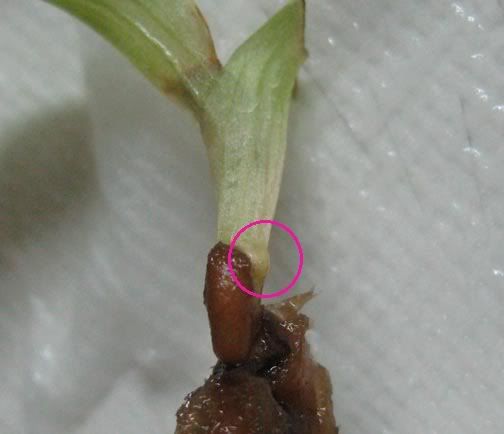
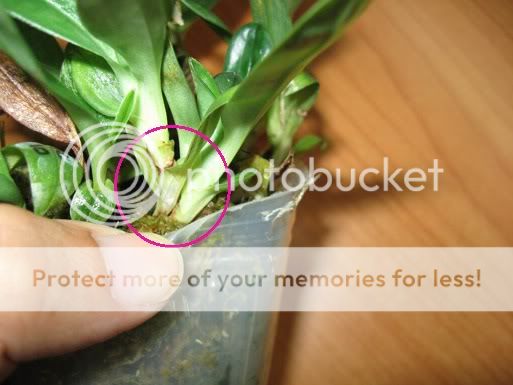
I cut off the elongated stems just below the new roots:
c2.jpg


To prevent browning, I soaked the cut ends in water for 30 minutes to let out excess sap:
c3.jpg


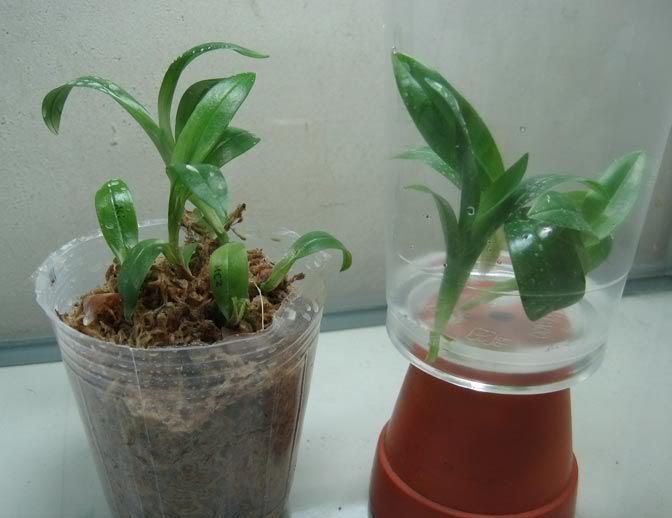
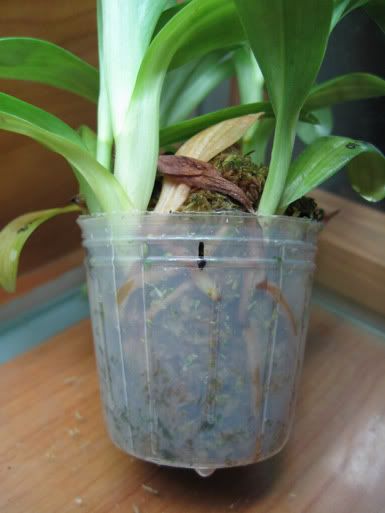
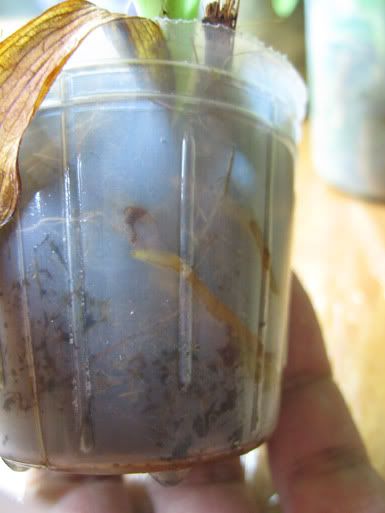
The top cuttings, rather-firmly potted in sphagnum in 2" pots; Off they went to ICU, together with the stumps:
c4.jpg


5.JPG


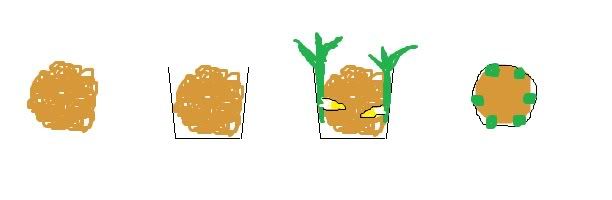
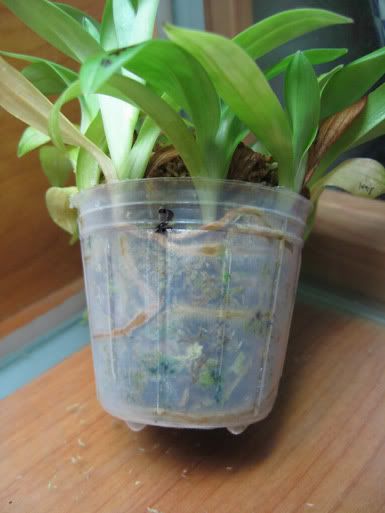
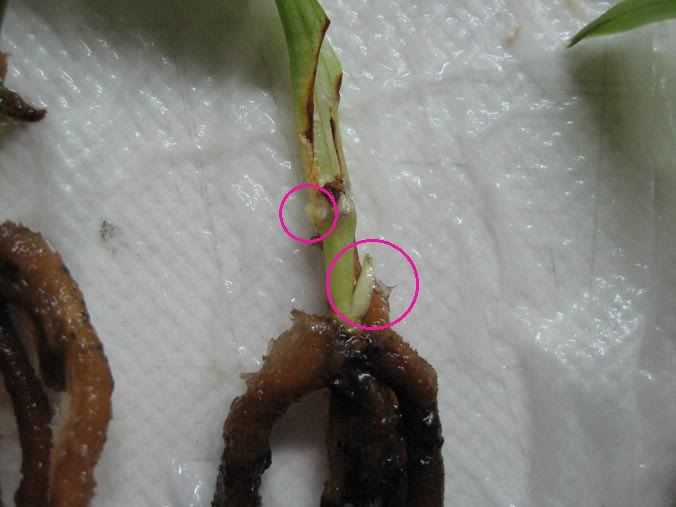
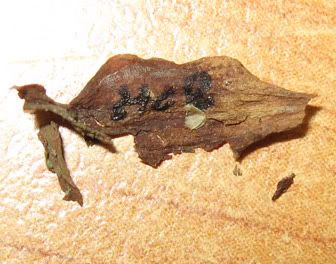
After 13 days, the roots of the stumps were still alive and growing nicely:
c5.jpg


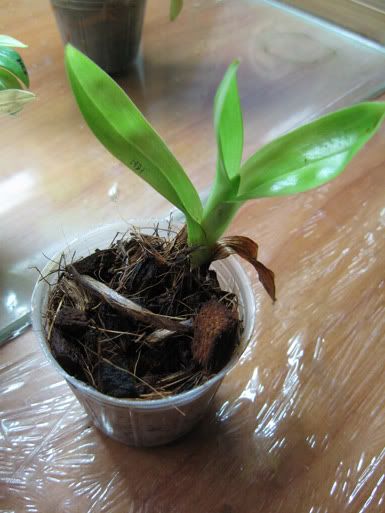
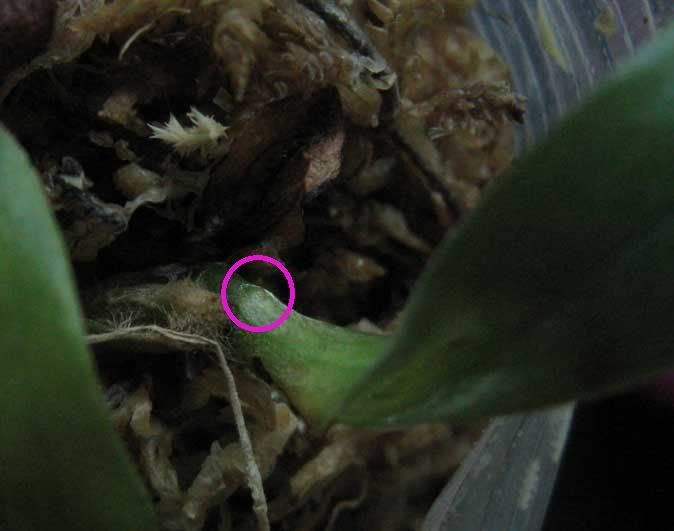
18 days after cutting, the stumps began to grow new shoots:
c7.jpg


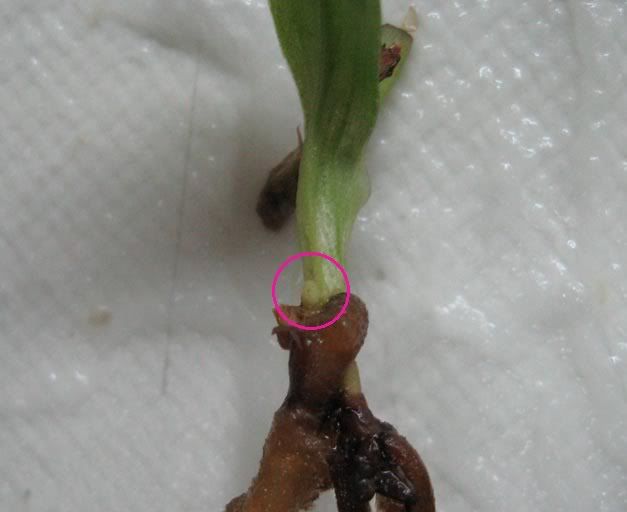
There were two growing on this one, the smaller one eventually lost the competition and did not grow:
c6.jpg


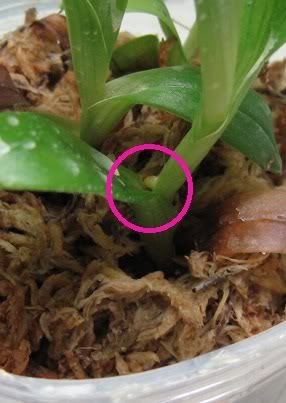
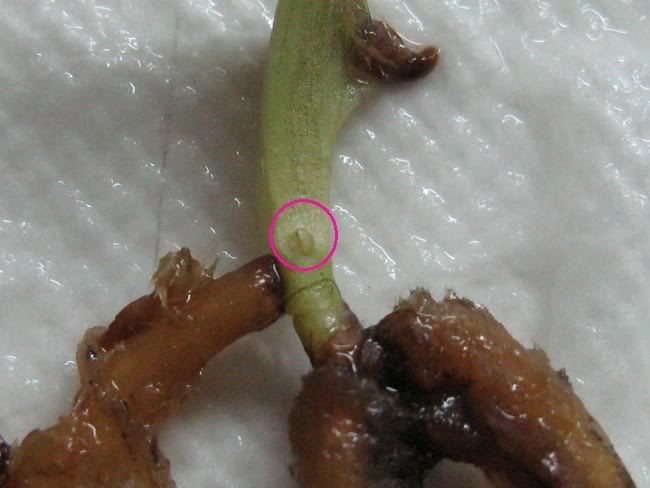
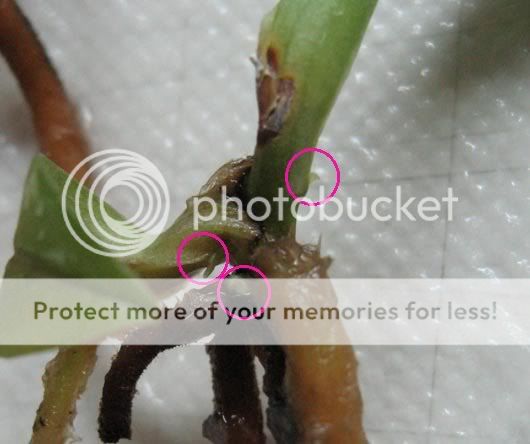
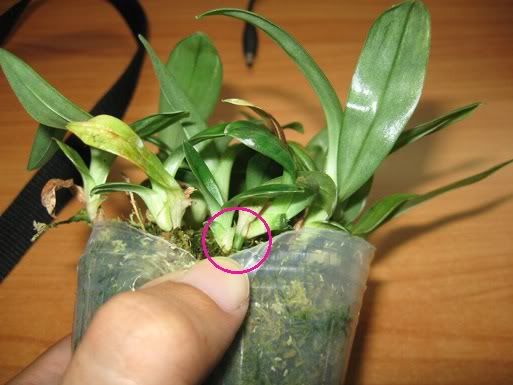
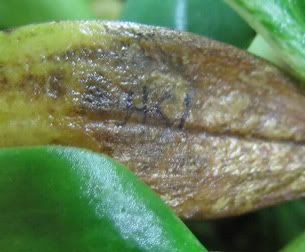
On this one, there was still elongated stem and two good roots directly below the new shoot, so I cut it to make a single node cutting:
c8.jpg


c9.jpg


c10.jpg


c11.jpg


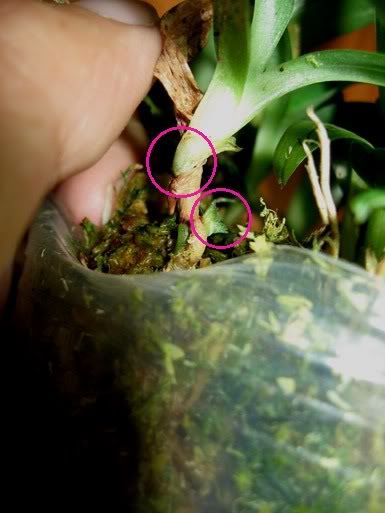
The stump still looked good after the second cutting was taken:
c12.jpg


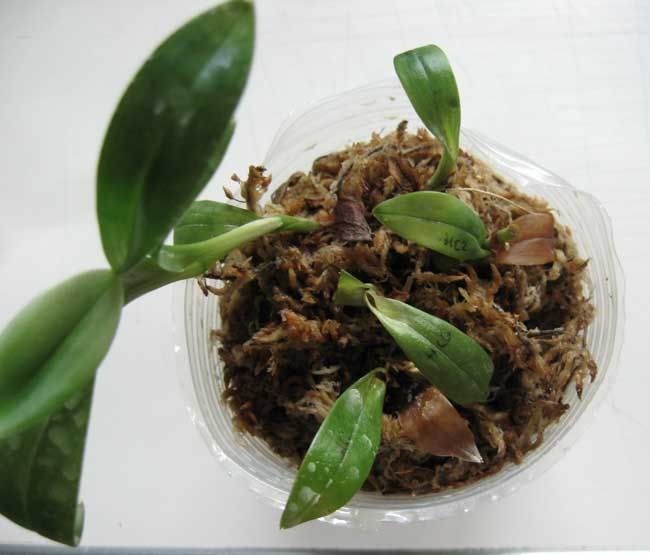
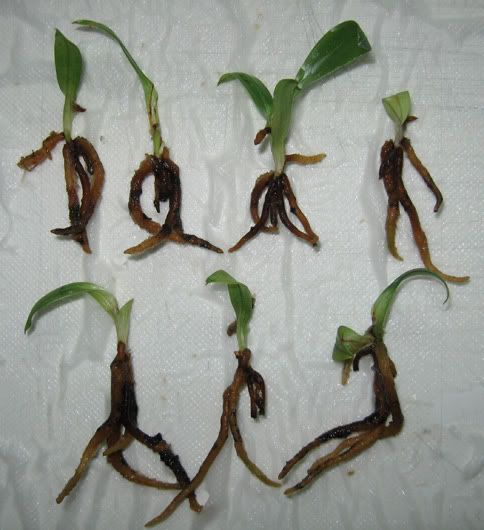
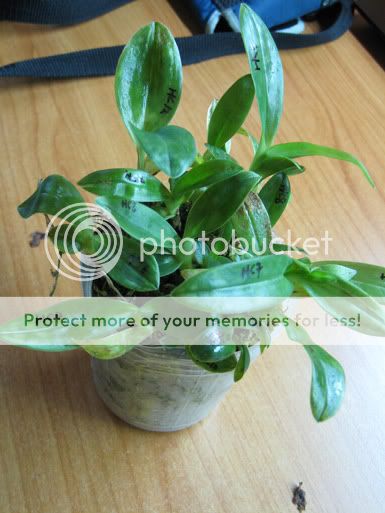
Here's how they looked after 80 days from the start:
c13.jpg


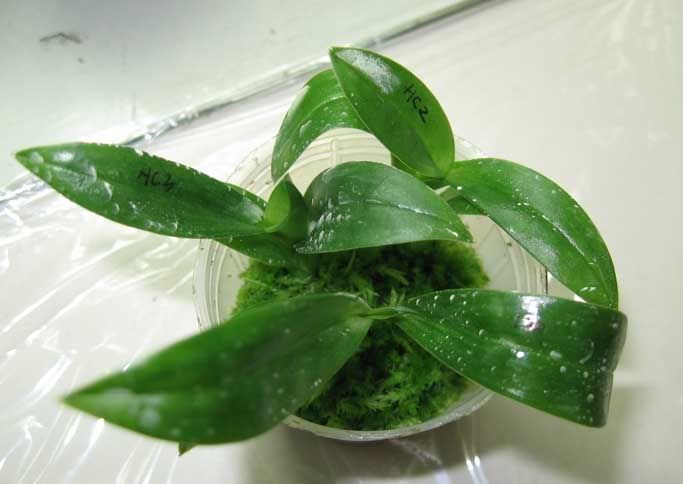
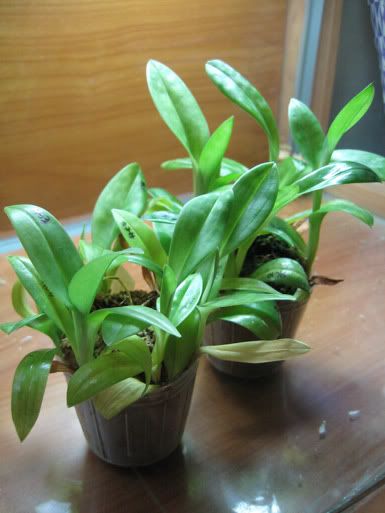
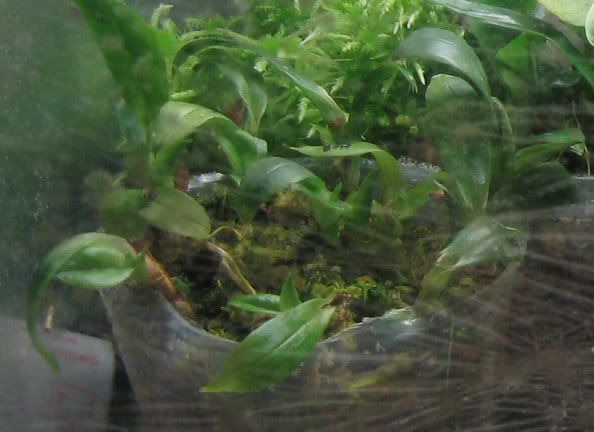
All of them survived nicely, here's how the top cuttings look now, photo taken few days ago. Hope you like the pics, cheers! ^_^
c14.jpg
 
Great demonstration. I'll always figured this would work with those Maudiae types that tend to climb out of their pots. The right hormone treatment should induce longer stems on other types and allow for the same kind of propagation.
 
I've grown a few this way too. Pieces that fell or broke off during repotting. Though all I did is stick them in moist spagnum until the roots took off.
 
great job hardy

hi hardy,

that's fantastic job you did on that photo shoot,
that's an eye opener for a lot long time paph. growers,
actually quiet often paphs make lanky stolons in flask ,
sometimes lab people start cutting them up in the flask
and this way propagate a few plants into many plants
in away it's kind of cloning that's done quiet often with maudiae types
in order to increase the numbers and create more homogeneous plants
for pot plant trade.
It's done more often then you think ,people keep it kind of to them selfs.
anyway once again thanks sharing this with us
happy orchid growing from Northern Thailand
cliokchi:clap::clap:;)
 
Very interesting and well grown... :) But you wouldn't be doing this unless you were really desperate to propagate a particular plant because it would delay flowering of the top cutting...I wouldn't be trying this with any of my Maudiae types as they don't really grow consistently good roots for me, as it is... :eek:
 
Very nice and excellently documented! Thank you very much for posting. An article in Orchid Digest is in order for sure.

I have done this with crawling Phrags before, e.g. besseae and it works very well with Phal's but I have not tried with Paph's.

Ron
 
:eek::eek::eek:WOW!!! I am amazed and jealous of your skills!!!! :D:D:D

It impresses me that you had no rot incidents...!!!! they would be dead in a day in my possession...:eek::eek::eek:
 
biothanasis, you're not alone!
:clap::clap: Great job hardy .......
I'm beginning to feel inadequate.:eek::(
 
:eek::eek::eek:WOW!!! I am amazed and jealous of your skills!!!! :D:D:D

It impresses me that you had no rot incidents...!!!! they would be dead in a day in my possession...:eek::eek::eek:

Hi Thanasis, I think I was just being lucky! I tried it just once, a little worried of course, so I was surprised too that they didn't rot. I think the fact that I used good quality sphagnum and some healthy plant material, and the very stable conditions in the fish tank helped a lot.

You should try it too! I used to hate it when my maudiaes grew tall, but actually I'm now hoping that my newest batch of seedlings will do just that. I'd love to keep all clones of the batch and yet be able to sell off some :D.

Uh, as for rot problems, I hate to say I'm dealing with that now with my latest batch of deflasked seedlings! :( Rot may be a hit and miss situation really, but IMO the quality of the plant to begin with is the most important factor.

Thanks all ^^
 
Great work and thank you for the tips... but I really think it is not the time for me at present to experiment...!!!:eek: Maybe when I have proper growing conditions!!!
 
I tried the stem cutting method on recently-deflasked maudiae-type
seedlings. Some of the seedlings had slightly elongated stems, and grew
some new roots about a month after deflasking. I cut the stems of these
seedlings just below the new root.
IMG_7304.jpg


IMG_7306.jpg


I cut the stems with a scalpel, taking care not to crush the tiny stems. After
which I dipped the cut ends in water for about an hour to remove the sticky
sap, which may cause some tissue browning when exposed to air.
IMG_7305.jpg


The rooting substrate I used was live sphagnum....
IMG_7325.jpg


...which I find to be very reliable. This was how they looked 3 weeks later.
IMG_7383.jpg


When the roots had grown a bit, I transferred the top cuttings to dried sphagnum.
drawing.jpg

I packed some moistened sphagnum into a soft translucent plastic pot, and
inserted the cuttings between the sides of the pot and the sphagnum moss.
Using a soft pot is useful, because it is flexible and inserting the small stems
was an easy task. Planting them at the sides also makes it easy to monitor
new root growth of the cuttings

Between the time they were cut, rooted in live sphagnum, and transferred to
dried sphagnum moss, the seedlings were grown under lights in an enclosed
glass tank. I didn't measure humidity but I guess it was close to saturation.

This is how the top cuttings look today, 8 months after they were cut.
IMG_9728.jpg


I treated them just like seedlings out of flask, and the cuttings made good
root growth in sphagnum moss.
IMG_9733.jpg


IMG_9734.jpg


I transferred one of the rooted cuttings from live sphagnum to straight CHC.
So far root growth has been healthy after several months in CHC.
IMG_9731.jpg


IMG_9730.jpg
 
As for the stumps, I noticed some "bleeding" of sap from the cut ends during
the first few days. Some of the stumps turned brown from the cut end. In
order to keep tissue browning under control, I had to blot the excess sap
frequently with tissue paper, and dust the wound with Benlate. Fortunately I
managed to keep the stumps from browning and rotting and all of them
survived. In retrospect, I think it would be beneficial to keep the substrate
the stumps are growing in on the dry side, to prevent the cut ends from
bleeding excess sap.

How the stumps looked 3 weeks after cutting:
IMG_7385.jpg


I observed that when the top growth is cut from a large plant, the stump
and the leaves attached could still support root growth. But for these small
seedlings, halted root growth was evident on some of the stumps.

In my previous experience with large seedlings 14 months out of flask, the
stumps produced new shoots 18 days after the top was cut. With these
small seedlings, they took up to a month to produce new shoots.
IMG_7384.jpg


I unpotted all the stumps, in order to grow them together in a compot. I
noticed that between 1 to 3 shoots were produced by each stump. It's also
interesting to note that they produced the shoots almost at the same time,
about a month after the top cutting was taken.
IMG_7400-2.jpg


IMG_7401.jpg


IMG_7402.jpg


IMG_7403.jpg


IMG_7405.jpg


IMG_7406.jpg


IMG_7407.jpg


IMG_7408.jpg


I compotted these into sphagnum moss and treated them like seedlings out
of flask. The photo below was how they looked 3 months after the cuttings
were taken.... (2 months after the basal shoots began to sprout)
IMG_8199.jpg


....and today (5 months later)
IMG_9721-2.jpg


I noticed that some of the multiple shoots could grow out together
IMG_9747.jpg


IMG_9744.jpg


But in others, apical dominance takes place, and only the upper shoot could
develop properly
IMG_9748.jpg
 
Today I also noticed some of the stump leaves I wrote on have withered.
IMG_9753.jpg


IMG_9756.jpg


IMG_9754.jpg


Just in time for me to re-label on the upper leaves, or else some of the
identities would have been mixed. :p
IMG_9751.jpg


All in all, I think taking cuttings from such small seedlings carries more risk.
The small stumps are prone to bleeding and browning, whereas I did not have
these problems when taking cuttings from large seedlings. So I was lucky
not to lose any of the top or stump portions :):)
 

Latest posts

Back
Top